Laboratory 1
I don't know what to do
1Look around the room and listen to what's being said.
2Maybe there's a lucky command written down somewhere?
3Try looking at the first page of the mysterious paper.
4AXYB
Laboratory 1
I don't know what to do now
1There were mentions of the experiment's contents beyond just the lucky commands. Try listening again.
2The experiment seems to involve folding the paper as shown in the diagram on the whiteboard. The second sheet of mysterious paper can be used as a large piece of origami.
3First, fold in half along the two lines coming from the corners to form a large triangle.
4Once you've made a triangle, fold the two pieces together along the mountain fold line to complete the whiteboard diagram.
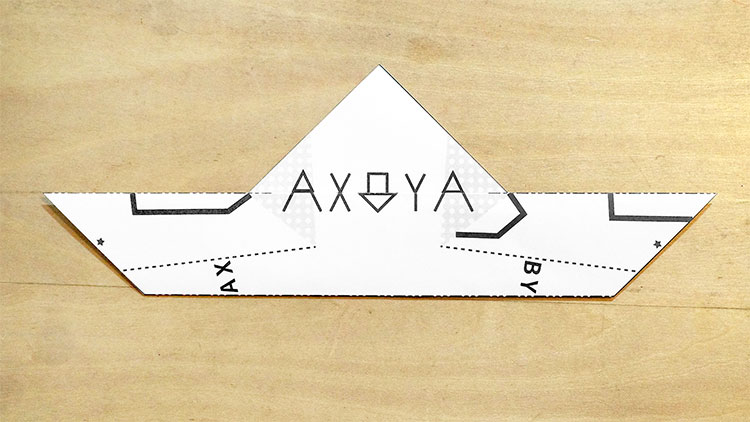
5AX↓YA
Laboratory 2
I don't know what to do
1Check the whiteboard. Is there a sun mark and a moon mark on the paper you've just folded?
2Bring the sun and moon together horizontally to match the diagram on the whiteboard.
3Flip the letters you've made 180 degrees. There should be letters and symbols in the center.
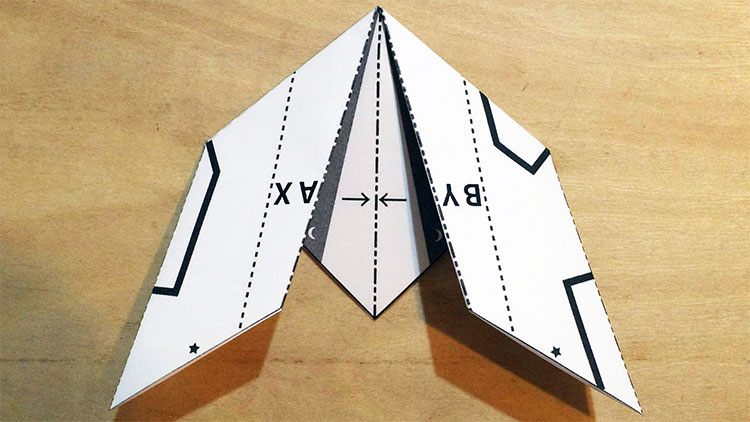
4BY→←AX
Laboratory 3
I don't know what to do
1The pedestal on the first sheet of the mysterious paper has a mark in each corner.
"Hide the ring, place it atop the pedestal" means that there should be three things you need to place there. Have you seen the marks on the pedestal somewhere else before?
2The second sheet of mysterious paper has drawings that look like constellations. Each of these includes a ○. Be aware of the cut lines extending toward the center, and watch the valley fold line as you fold the paper.
3The only way to hide the ring with the valley folds is to stop folding at 90 degrees and make a three-dimensional object. Folding the constellations into 3D objects, hiding the ring in the heart-shaped constellation makes B, hiding the ring in the chair-shaped constellation makes A, and hiding the ring in the stick man constellation makes Y.
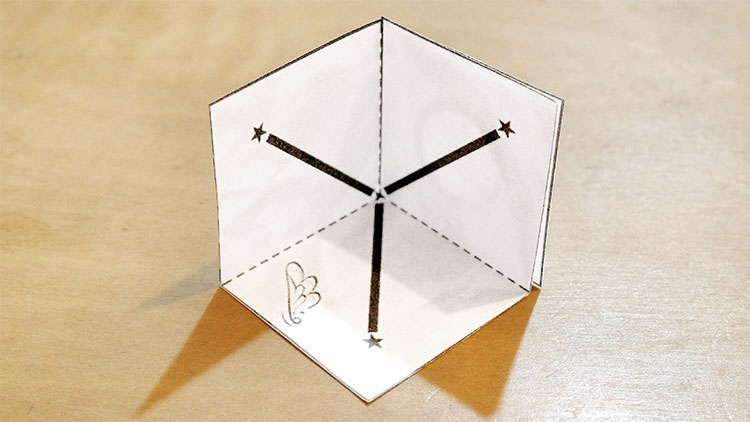
4Once you've completed the objects to set on the pedestal, match them with the correct symbols and put them in place. The three marks will indicate buttons.
5ABY
Refuge
I don't know what to do
1There must be some way to fold things to make the symbols written on the whiteboard. The image of the airplane drawn in the upper right of the whiteboard is a diagram of the end result of folding.
2The origami you made before the 3D objects has valley folds extending to both sides of B Y and A X, and a mountain fold down the middle. Fold these so they overlap to make an airplane shape.
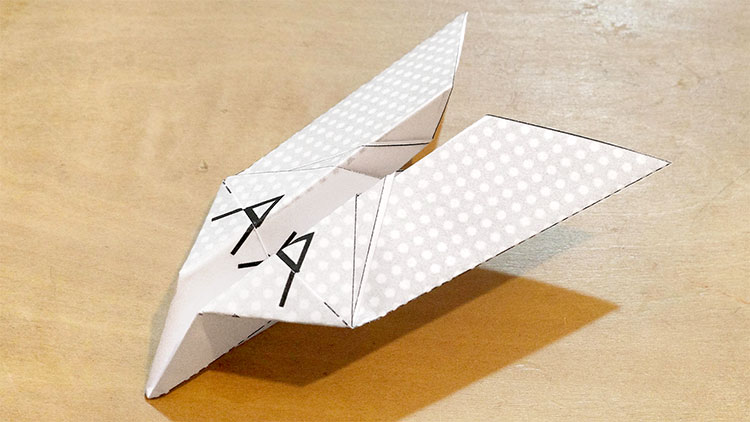
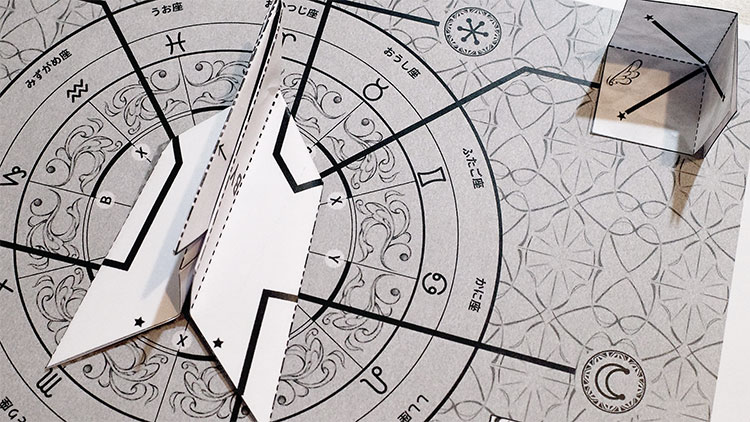
3Folding back the airplane you've made will create the same symbol as the one on the whiteboard in the polka dot pattern. In the center of the star chart is an airplane, and the same polka dot pattern and symbol. Place the airplane here to change how the line linking the pedestal and the symbols connects things. Input the new commands that correspond to this.
4Look closely at the whiteboard. Is there something different about the instructions for entering commands than before? Previously, there were only three symbols drawn, but now there are right-facing arrows between the symbols for the commands. Make sure to include the right arrows with the symbols.
5B→Y→A
Refuge
I don't know what to do now I've jumped to a different place
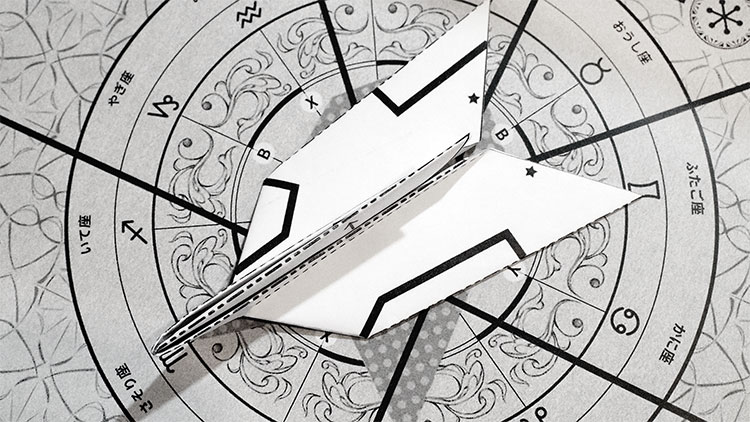
1Starting from the left, we have Taurus, Libra, Scorpio, and Leo.
2The airplane used for the star chart is pointing toward Aries. Look closely at the airplane.
3There are stars on the back sections of both the airplane's wings. There seems to be an X between the stars when it points toward Aries.
4Rotate the airplane in the center of the star chart so it faces Taurus, Libra, Scorpio, and Leo. When pointing toward each constellation, the letters that appear between the stars on the wings act as commands.
5YABX